Configure a patch policy
Patch policies provide you with advanced control over how you apply patches in your environment. You can manage when to apply patches, what types of patches to apply, and configure notifications to alert you when a policy has executed an action. Patch policies can be assigned to individual systems, groups, or a combination of both.
To create a new patch policy follow these steps:
Step 1: Open the patch policy page
Head over to https://patchdeck.com/patch_management/policies. Here you can see all your patch policies. To edit or delete a patch policy use the buttons beside the patch policy:

Step 2: Create a new policy
1. Click on “Create new policy” to start the wizard for creating a patch policy:
2. Enter a name for the policy
3. Select systems and groups the policy should be attached to
4. Select the type of patch policy you want to create:
Auto-Patch: This type of policy runs continuously (or during a specified time window, see step 7) and keeps the attached systems up-to-date. You have the following options for this type of policy:
– Security Patches Only: Only apply security patches automatically
– Include Windows Feature Update: Also apply Windows Feature Updates as part of this patch policy
– Package keywords: Specify a list of keywords against which patch names will be matched (case-insensitive matching). This allows you more control over which patches to apply and lets you keep a specific application up-to-date. Here is an example of how you would configure to auto-patch 7zip:

Patch Rollout: This type of policy will run only so long until all patches that you selected for the rollout have been applied to the attached systems.
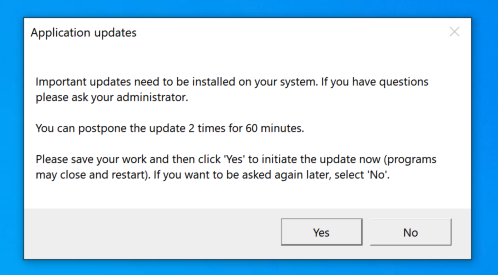
5. Decide if users should receive a warning message before patches for third-party applications are installed to give them time to save their work. You can customize the warning message and decide how often and for how long a user should be able to postpone the patching process. For an example of the message that an enduser receives, see below. Please note that this is only supported on Windows systems running at least version 2.5.0 of the Patchdeck agent.
6. Decide wether you want to configure notifications. When you activate notifications you can attach one of your notification methods (email address or third-party integration) to this policy in the next step. You will then receive notifications every time the policy has taken an action.
7. Decide wether the policy should be always active. A policy that is always active runs continually and checks for unpatched systems. If you want to configure a specific time window (e.g. a maintenance window) for your patch policy select “No” here and configure the weekdays and time windows for your policy in the next steps. Please note that the time values are always in the timezone you configured in your profile.
That’s it! Your patch policy is now configured and you can see all the details by clicking on the name of the patch policy at https://patchdeck.com/patch_management/policies. You can also always edit your patch policies and the changes will take effect immediately.
Optional: Pause a patch policy
If you want to temporally pause a patch policy use the “Edit” button for the patch policy at https://patchdeck.com/patch_management/policies and then toggle the setting for “Policy is paused” to “Yes”. As long as the status of the policy is set to paused, it will not run, regardless of the timing settings of the policy.